
Furnace Flame Sensor Cleaning: A Step-by-Step Guide
- Bryn Fortmuller
- Jul 31
- 12 min read
If your furnace lights, runs for a few seconds, then shuts off and tries again , a dirty flame sensor is almost always the reason. It's one of the most common furnace problems, and cleaning it takes about 15 minutes with tools you probably already own. Here's exactly how to do it safely.
Table of Contents
What a Furnace Flame Sensor Does — and Why a Dirty One Causes Problems
The flame sensor is a small metal rod, usually about three inches long, mounted near the burner assembly inside your furnace. Its job is simple but critical: confirm that the burners actually ignited before the gas valve stays open.
Here's how it works. When your furnace calls for heat, the igniter glows hot, the gas valve opens, and the burners light. The flame sensor sits right in that flame. A small electrical current passes through the rod and into the flame itself. Because burning gas conducts electricity, the flame completes a circuit and sends a micro-amperage signal back to the control board. The control board reads that signal and keeps the gas valve open.
If the sensor doesn't detect that micro-amp signal within about 10 seconds, the control board assumes no flame is present. It shuts the gas valve as a safety measure. The furnace then tries again, and if it fails two or three more times, it locks out entirely, sometimes for an hour or two before attempting another cycle.
The problem with a dirty sensor isn't that the flame disappears. The flame is there. It's that a thin layer of oxidation or carbon buildup on the rod surface insulates it, blocking the current from passing through cleanly. Gas appliance failures are a well-documented safety concern, which is exactly why the sensor's lockout function matters so much. You want it working correctly, not tripping unnecessarily because of grime.
Most sensors accumulate enough buildup within one to two heating seasons to start causing intermittent shutdowns. In the Sierra foothills , where furnaces in Placer County and Nevada County run hard through cold winters , an annual cleaning before the season starts is smart maintenance.
Key Takeaway:A dirty flame sensor doesn't block the flame , it blocks the micro-amp signal the control board needs to keep the gas valve open, causing your furnace to shut down as a false safety trip.
Our winter furnace maintenance checklist puts flame sensor cleaning at item four, right after filter replacement and burner inspection, because catching it early prevents a no-heat call on the coldest night of the year.
Step 1: Diagnose Before You Clean — Rule Out Other Causes First
Before you pull anything apart, confirm the flame sensor is actually the problem. A few other issues can mimic the same symptom of short-cycling, and cleaning a sensor that isn't the culprit wastes time.
Watch one full startup cycle. Turn the thermostat to heat and observe what happens:
The igniter should glow orange-hot within about 30 seconds.
The burners should light and burn steadily.
If the furnace shuts off within 5 to 15 seconds of the burners lighting, and repeats this two or three times before locking out, that's a flame sensor signature.
If the igniter never glows, or the burners never light at all, the problem is upstream of the sensor. Check these first:
Thermostat settings:Confirm it's set to Heat mode and the set temperature is above room temperature.
Filter restriction:A clogged filter can cause the pressure switch to trip, preventing ignition entirely.
Pressure switch hose:A cracked or disconnected rubber hose to the pressure switch mimics sensor failures on some models.
Gas supply:Check that the manual shutoff valve on the gas line to the furnace is fully open (handle parallel to the pipe).
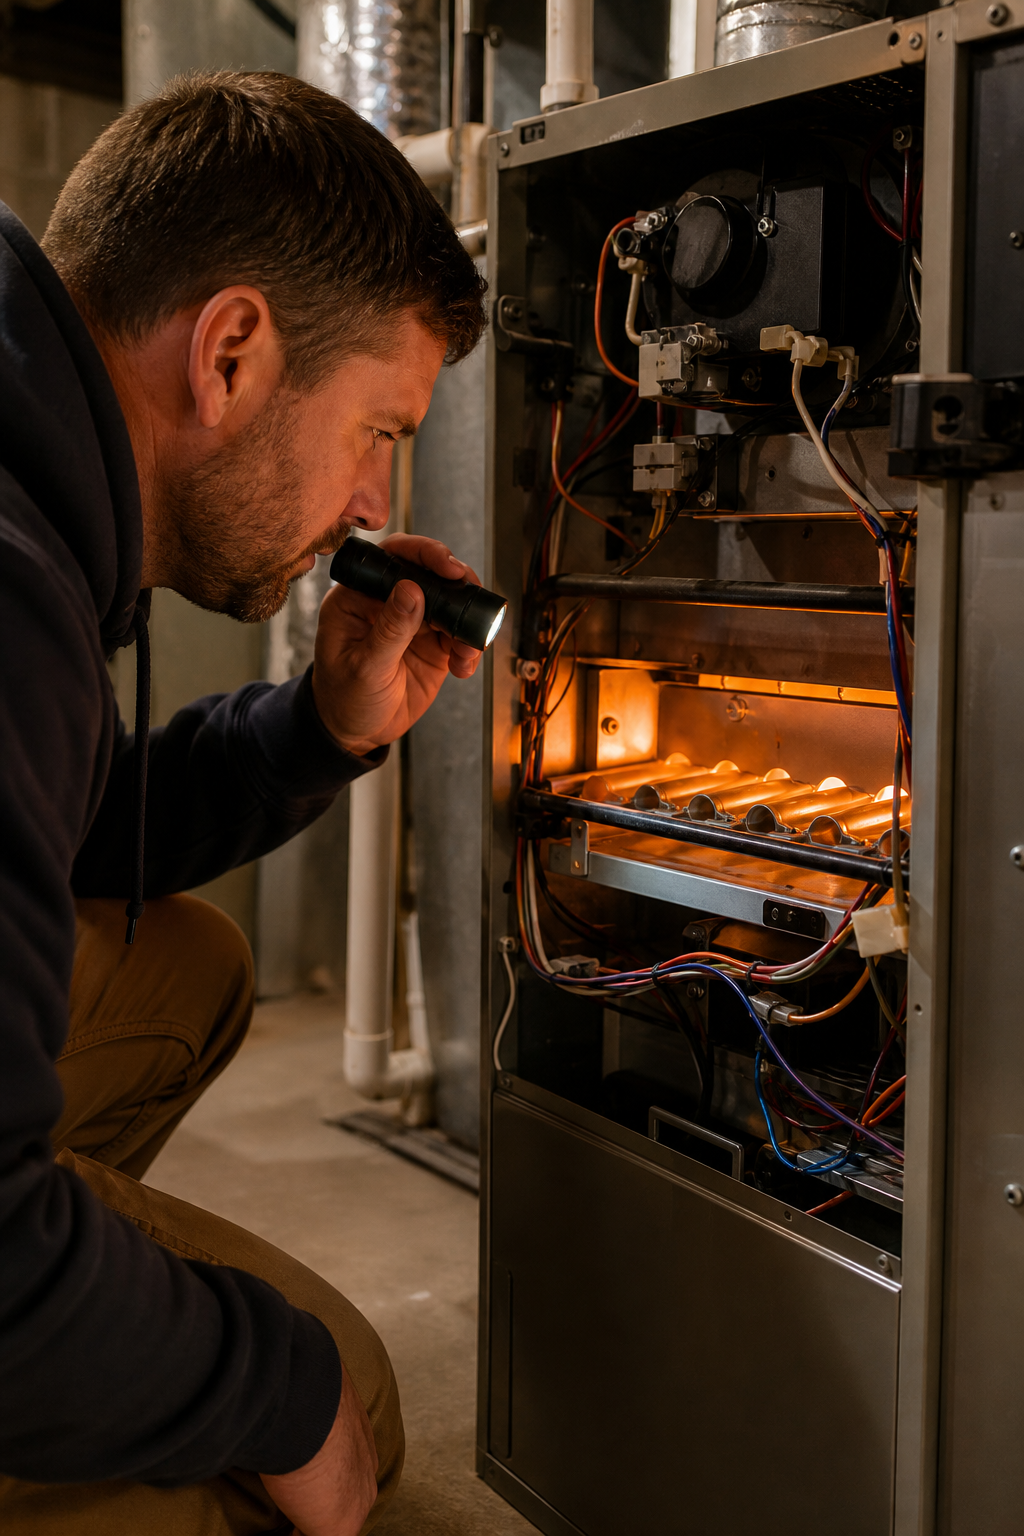
If the burners light and the furnace shuts down quickly , and repeats the pattern , you've confirmed sensor behavior. Move on to cleaning. If something else is failing upstream, cleaning the sensor won't help, and you may need a technician to check the igniter, gas valve, or control board.
One more thing: error codes. Many furnaces flash a LED code on the control board to identify the fault. Count the flashes (or check the label inside the access panel door) before you start. A flame sensor fault code gives you a direct confirmation. A pressure switch code or limit switch code points elsewhere.
Step 2: Safety First — Shut Down Power and Let the Furnace Cool
Never reach inside a furnace while it has power. Even though the flame sensor circuit carries very low voltage, the control board and other components in the cabinet run on 120V line voltage. One wrong move costs you more than a service call.
Follow these steps in order:
Turn the thermostat offor set it to a temperature below room temperature so the furnace won't try to start.
Find the power switch on the furnace, it looks like a standard light switch, usually on the side of the unit or on a nearby wall. Flip it off.
Trip the furnace breakerat your main electrical panel for added safety. Label it if it isn't already marked.
Now wait. If the furnace has been running recently, the heat exchanger and burner components hold heat for several minutes. Give it at least 10 minutes before reaching inside. Touching a hot burner tube with your bare hand causes a real burn, and bumping a hot igniter can crack it (igniters are fragile and expensive).
Gather your tools before you open anything:
Nut driver or screwdriver (usually 1/4-inch or 5/16-inch hex)
Fine steel wool (fine grade) or light-grit wet sandpaper
Clean cloth or paper towel
Small flashlight
A container or magnetic tray for screws
Light gloves are a good idea , not because of electrical risk at this point, but because oils from your fingertips can contaminate the sensor rod. The same oil that makes a stainless pot look streaky will leave a film on the sensor that bakes on and causes the same problem you're trying to fix.
Step 3: Locate and Remove the Flame Sensor
Remove the furnace access panel. On most units, this is the lower front panel, and it either lifts off a lip or is held by one or two screws. Set it aside carefully.
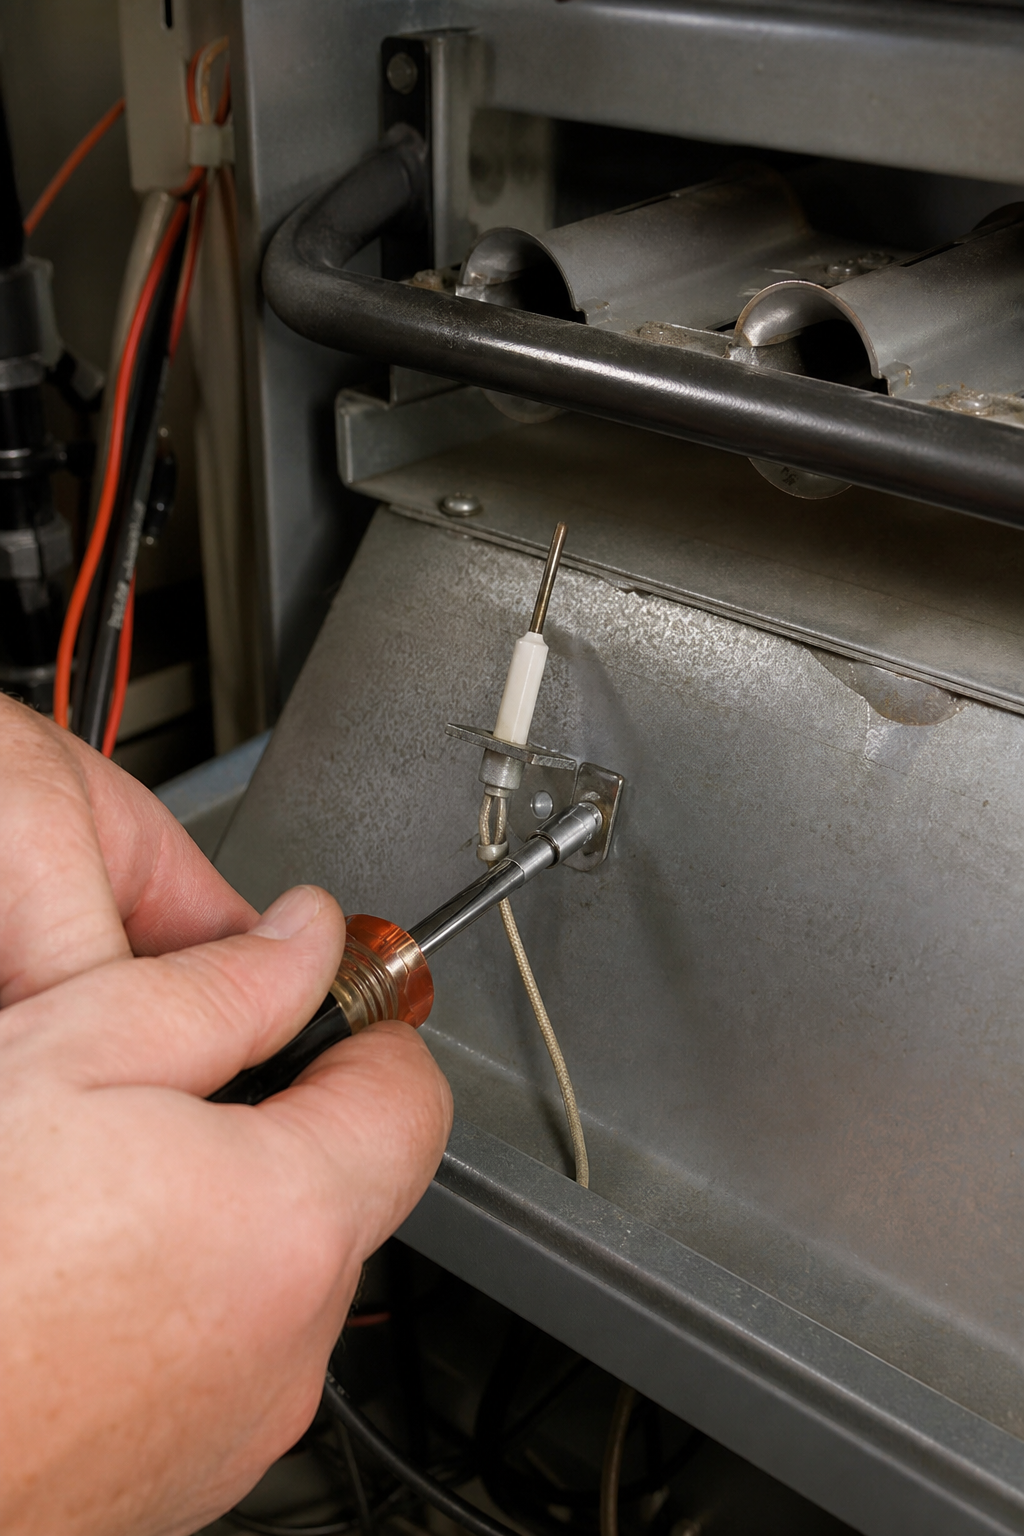
Look toward the burner assembly , the row of metal tubes where the flames appear. The flame sensor mounts at one end of the burner rack, typically on the far right or far left, positioned so the rod tip hangs down into the flame path. It has two identifying features: a single wire connector at one end, and a porcelain or ceramic insulator separating the rod from its mounting bracket. If you see two wires, that's the igniter , keep looking.
Most sensors use one screw through a small metal plate to hold them in place. It's almost always a 1/4-inch hex head screw.
If the sensor is easy to reach (Category 1)
Use your nut driver to back out the screw. Hold the sensor with your other hand so it doesn't fall and crack the porcelain. Pull the wire connector straight off the terminal end , no twisting, just a firm straight pull. You're done with removal.
If the sensor is awkward to reach (Category 2)
Some furnace models , particularly certain Carrier, Bryant, and Trane configurations , mount the sensor behind the intake pipes or partially inside the burner box. A flexible bit extension holder makes this workable. Attach it to your nut driver, work the bit around the obstruction, and loosen the screw slowly. The screw will try to fall; keep your finger on it or use a magnetic bit.
If the sensor is really hard to reach (Category 3)
This is where most DIY guides stop, but it's worth knowing the technician's trick. Look for the black air duct assembly that runs across the front of the burner box. On many furnaces, it's held by just two or three screws. Remove those screws, then pull the intake pipe slightly away from the assembly (they're usually not glued). The air duct drops down and out, giving you full hand access to the sensor. What was a 20-minute battle becomes a two-minute job.
Once the sensor is out, note its angle before you fully remove it. The rod tip needs to sit in the flame at the right position when you reinstall. A quick photo with your phone takes two seconds and saves frustration later.
Pro Tip:Drop the mounting screw into a magnetic tray or set it inside your shirt pocket the moment it comes free. Losing it inside the furnace cabinet adds 15 minutes to the job.
Step 4: Clean the Flame Sensor the Right Way
Take the sensor somewhere with good light. Compare the rod to a new one if you have it. A clean sensor looks dull silver or lightly tarnished. A dirty one has visible dark charring, a flat gray oxidized coating, or a rough gritty texture.
What to use
The goal is to remove oxidation and carbon deposits without scratching the rod surface deeply. Light abrasion is right. Aggressive abrasion shortens the sensor's life by removing the outer metal layer faster than corrosion would.
Good options, ranked by preference:
Fine steel wool (very fine grade):The most recommended tool across experienced HVAC technicians. It's gentle enough not to scar the rod but abrasive enough to remove buildup in a few passes.
1000-grit wet sandpaper:Works well. Use it dry for this application. Don't go below 600 grit , coarser paper leaves scratches that collect deposits faster in the future.
Emery cloth:Similar to sandpaper and a common shop tool. Fine grades are fine here.
Scotch-Brite pad (green):The non-scratch version works. The standard green pad is mildly abrasive and suitable for light buildup.
A new dollar bill (or a $5 bill):Paper currency has a slightly abrasive texture from the fiber content and printing. It works for light oxidation when you have nothing else. It won't handle heavy charring, but for a sensor that's just been a season too long without maintenance, it gets the job done.
What not to use
Avoid wire brushes , they're too aggressive and will score the rod surface. Don't use coarse sandpaper (anything below 400 grit). Never use chemical cleaners, solvents, or electrical contact spray on the sensor rod itself; those residues don't fully evaporate and can interfere with the micro-amp signal.
How to clean it
Hold the sensor by the porcelain insulator or the mounting plate end. Keep your fingers off the rod. Wrap a small piece of steel wool around the rod and rub back and forth along the length of it. You're not sanding it down , you're polishing off the surface layer. Ten to fifteen passes is usually enough.
The rod won't look mirror-bright. That's fine. You're aiming for a uniform, slightly shiny appearance without dark patches or rough texture. Once it looks clean to the touch (run the steel wool along it and it should feel smooth), give the rod a quick wipe with a clean dry cloth to remove any metal particles from the abrasive.
Do not touch the cleaned rod with bare fingers after this step. Set it down on a clean surface or hold it by the porcelain only.
Standard home heating safety guidance is clear that furnace maintenance should always be done with the unit fully powered down , a reminder worth repeating before you move to reinstallation.
Step 5: Reinstall the Sensor and Test Your Furnace
Slide the sensor back into its mounting position. Match the angle you noted (or photographed) before removal , the rod tip needs to point into the burner flame path, not above or below it. A sensor that misses the flame entirely reads exactly like a dirty one.
Thread the mounting screw in by hand first. This prevents cross-threading, which is especially important on aluminum brackets (as noted in the YouTube footage from DIY with Michael Borders , over-tightening strips aluminum fast). Snug is enough. You don't need torque here, just enough to hold the sensor firm so it won't rattle or shift.
Reconnect the wire. Push the connector straight on until it seats with a slight click or firm resistance. Give it a gentle tug to confirm it's seated , a loose connector causes the same intermittent failure as a dirty rod.
If you removed the air duct assembly for a hard-to-reach sensor, reinstall it now. Line up the screw holes, reseat the intake pipe, and run the screws back in. Check that the wiring use protector is back in position over any exposed wires.
Now test:
Replace the furnace access panel.
Restore power at the switch and breaker.
Set the thermostat above room temperature.
Watch the startup cycle. The igniter should glow, burners should light, and the flame should hold steady without shutting off.
If the furnace was in lockout mode from repeated failed cycles, it may need a reset first. Turn the power switch off, wait 30 seconds, then back on. That clears the lockout on most models.
A successful fix: the burners light and stay on. The furnace completes its heating cycle, the blower comes on, and the system runs normally until the thermostat is satisfied. By this point, the cleaning is done and you've restored the sensor's ability to pass a clean micro-amp signal to the control board.
When to Replace the Flame Sensor Instead of Cleaning It
Cleaning fixes a dirty sensor. It doesn't fix a failing one. There are situations where the sensor needs to come out and stay out.
Replace the sensor if:
The rod is visibly cracked or pitted.Deep pitting means the metal has been eroded past the point where the surface conducts reliably, even after cleaning.
The porcelain insulator is cracked or chipped.A cracked insulator allows current to leak to ground before it reaches the control board, causing false readings regardless of rod condition.
Cleaning fixes it temporarily but the problem returns within a few weeks.This pattern suggests the sensor is near the end of its life , the surface is degrading faster than normal buildup explains.
The furnace still short-cycles after a thorough cleaning.If you cleaned it well and the burners still shut off in under 15 seconds, the sensor may be out of spec. A technician can check the micro-amp output with a multimeter; a healthy sensor typically reads between 1 and 10 microamps. Below 1 microamp, most control boards reject the signal.
Replacement sensors cost roughly $10 to $30 for most residential furnace brands. They're not model-specific in many cases , the rod length and connector type matter more than the brand. Some homeowners in Placer County and Nevada County keep a spare on hand through the heating season, which makes good sense when a Sunday night failure in January means a cold house until Monday morning.
If you're not sure whether the sensor is the real issue, or if the furnace has other codes showing alongside the sensor fault, that's the right time to call a professional. At Home Worx Heating and Cooling, we serve homeowners across Auburn, Colfax, Grass Valley, and the surrounding foothill communities with same-visit diagnostics and flat-rate repair pricing. Our full HVAC service options include furnace repair, maintenance contracts, and 24/7 emergency response for exactly these situations.
If a replacement sensor doesn't resolve the issue, the control board itself may be misreading the signal. Control board replacement is a bigger job and generally warrants a professional diagnosis before committing to that expense, since replacing the board may not fix the root cause if something else is driving the fault.
Property managers overseeing multiple units in Northern California may also find it useful to pair furnace maintenance with sourcing reliable parts for other facility equipment , since keeping maintenance supplies on hand , whether for HVAC or other building systems , reduces downtime across the board.
FAQ
How often should I clean my furnace flame sensor?
Clean the flame sensor once a year, ideally at the start of the heating season before the furnace runs regularly. In areas with long winters, like Placer County or Nevada County, an annual cleaning in October or early November keeps the sensor in good shape and prevents unexpected shutdowns mid-season. If your furnace runs very frequently or the sensor is prone to heavy buildup, cleaning every season is reasonable.
Can I use sandpaper to clean a flame sensor?
Yes, but use fine-grit sandpaper only, 1000 grit or higher. Coarse sandpaper (below 400 grit) removes too much surface material and shortens the sensor's life. Fine steel wool is generally a good choice because it conforms to the rod's shape and polishes rather than scratches. Avoid anything abrasive enough to leave deep grooves in the metal surface.
Why does my furnace keep shutting off after I cleaned the sensor?
If the furnace still short-cycles after a thorough cleaning, a few things could be going on. The sensor may be at the end of its life and needs replacement. The wire connector may not be fully seated. The sensor tip may not be positioned correctly in the flame. Or another component, like the pressure switch or control board, is the actual fault. Check the error code display on the control board for guidance.
Is cleaning a furnace flame sensor safe for a homeowner to do?
Yes, with the power fully off. Turn off the thermostat, the furnace power switch, and the circuit breaker before opening the access panel. The flame sensor circuit carries very low voltage, but other components in the cabinet run at 120V. Wait for the unit to cool before reaching inside. If you're uncomfortable with any step, or if the furnace has a gas odor, stop and contact a licensed HVAC technician.
How much does it cost to have a technician clean the flame sensor?
Most HVAC technicians include flame sensor cleaning as part of a standard furnace tune-up; pricing varies by region and contractor. A standalone service call for a sensor cleaning alone may run higher due to the minimum trip charge. Buying a spare sensor for $10 to $30 and keeping it on hand is a usable backup if the cleaning doesn't hold.
What does a flame sensor look like in a furnace?
A flame sensor is a thin metal rod, usually two to four inches long, attached to a small mounting bracket with a single screw. One end has a porcelain or ceramic insulator and a single wire connector. The other end, the rod tip, extends into the burner flame path. It's smaller than most people expect and is easy to confuse with the igniter, which has two wires and a broader heating element.
Keep the Heat On
A dirty flame sensor is a 15-minute fix, not a service call. Clean it once a year, use fine steel wool, and keep your hands off the rod after cleaning. If the problem comes back fast or the furnace still misbehaves after the cleaning, it's time to replace the sensor or have a technician check the micro-amp output. Homeowners in Placer and Nevada County can reach out to Home Worx Heating and Cooling for furnace repair and maintenance , we're local, family-owned, and available 24/7 when something goes wrong mid-winter.